Hearing new noises coming from the main workhorse rig is never exciting. Lately the fans have been ramping up most of the time, it sputters on audio output whenever more than two applications are running, it’s just tired. After 9 years of service, doing everything I asked of it and still hanging on, that’s pretty damn impressive and one of the main reasons that I always suggest building your own work machine rather than buying something already put together.
Building the new “decade rig” was extremely exciting but came with new challenges I don’t remember facing before. Most parts are not hard to source and luckily I didn’t have to worry about RAM or storage like in the previous years. Got lucky right? Sadly, No. The most important parts of the rig were incredibly hard to find at the end of 2020 and still continue to be a problem sourcing to this day due to COVID 19 related supply shortages: CPU and GPU.
Since this machine is put together with the purpose to perform for a decade, or nearly a decade, the main components have to be latest tech… after all, as soon as you buy those parts they are already on their way to being obsolete. So therein lies the issue, Ryzen Gen 3 chips and latest GPUs (RTX 3000 series in my case) are extremely hard to purchase at the moment and should remain this way for the foreseeable future. I could have just opted for previous gen chip and gpu but while the CPU wouldn’t be too difficult to get the GPU market is bad up and down the generations… even used. I only had one choice, accept the challenge of scoring the latest of everything and make a game out of it.
For best results I joined every Discord server that was related to these products. While auto stock drop notifications with links proved to be fairly useless I did have eventual success with stock drop notifications that alerted when a drop would occur. This allowed me to camp out on the product pages and F5 ten minutes before the time of the drop.
Amazon was nearly useless but I did end up picking up a Ryzen 5600X at one point at MSRP, the shipping was a little too far out so I ended up canceling when I got a better shipping time elsewhere. Best Buy system is atrocious and nearly useless as stock is almost always unavailable in my area. Newegg proved to be the winner here with the ability to use Apple Pay one click purchase: once setup, your payment and shipping is all there, literally one click and you get your confirmation.
Using Discord for time of drop notifications on Newegg and Apple Pay one click purchase I was able to score Ryzen 5800X and RTX 3060 ti, all shipped within a week of purchase or sooner. All in all it took about 2 weeks to secure the CPU and 3 weeks for the GPU. All in the month of December 2020.
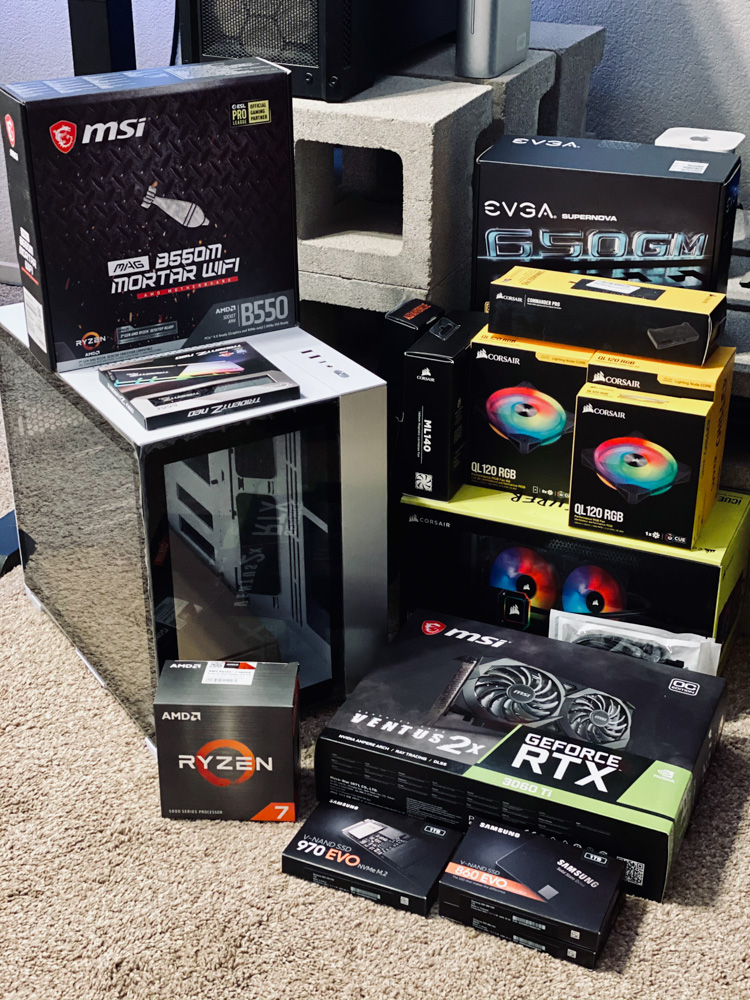
Full parts list of the machine.
| Type | Item | Price |
|---|---|---|
| CPU | AMD Ryzen 7 5800X 3.8 GHz 8-Core Processor | Purchased For $449.00 |
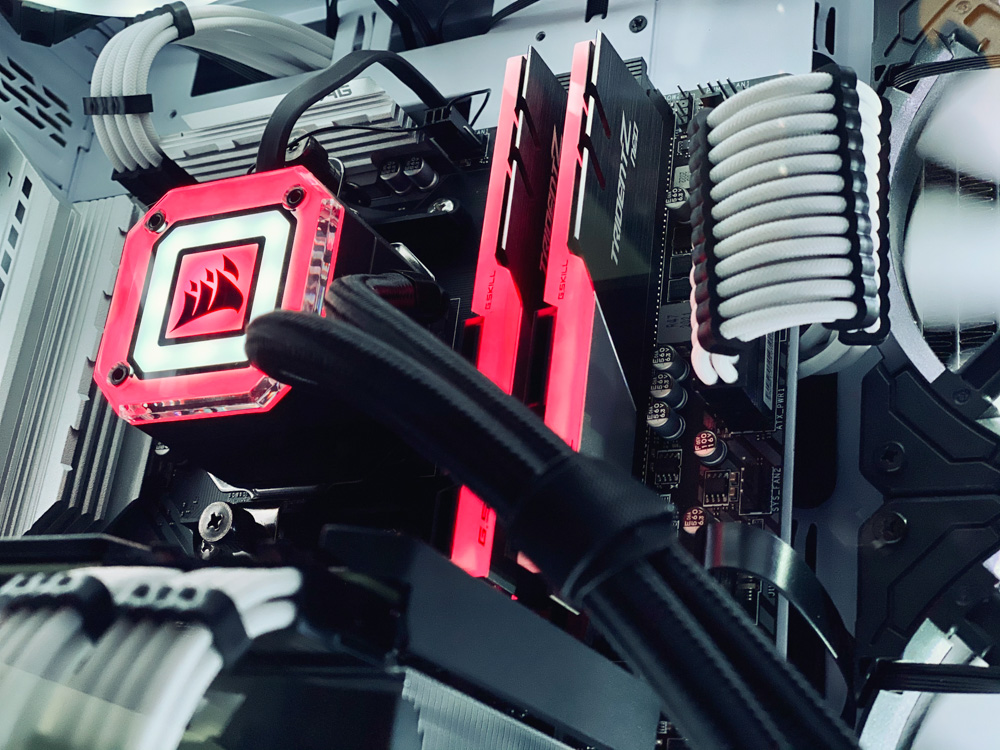
| CPU Cooler | Corsair iCUE H115i ELITE CAPELLIX 97 CFM Liquid CPU Cooler | Purchased For $169.99 |
| Motherboard | MSI MAG B550M MORTAR WIFI Micro ATX AM4 Motherboard | Purchased For $173.01 |
| Memory | G.Skill Trident Z Neo 32 GB (2 x 16 GB) DDR4-3600 CL16 Memory | Purchased For $184.00 |
| Storage | Samsung 860 Evo 500 GB 2.5” Solid State Drive | Purchased For $53.99 |
| Storage | Samsung 860 Evo 1 TB 2.5” Solid State Drive | Purchased For $99.99 |
| Storage | Samsung 970 Evo 1 TB M.2-2280 NVME Solid State Drive | Purchased For $129.99 |
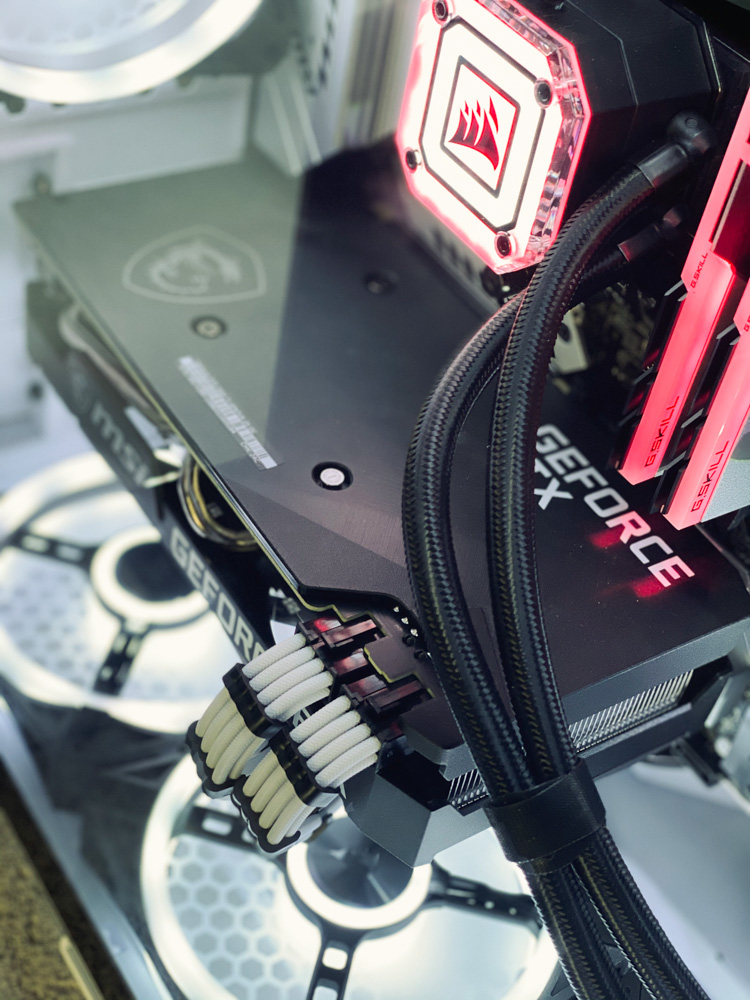
| Video Card | MSI GeForce RTX 3060 Ti 8 GB VENTUS 2X OC Video Card | Purchased For $439.99 |
| Case | Lian Li O11 Dynamic Mini ATX Mid Tower Case | Purchased For $97.17 |
| Power Supply | EVGA SuperNOVA GM 650 W 80+ Gold Certified Fully Modular SFX Power Supply | Purchased For $108.14 |
| Operating System | Microsoft Windows 10 Pro OEM 64-bit | $140.00 |
| Case Fan | Corsair ML140 97 CFM 140 mm Fans 2-Pack | Purchased For $39.99 |
| Case Fan | Corsair iCUE QL120 41.8 CFM 120 mm Fan | Purchased For $44.99 |
| Case Fan | Corsair iCUE QL120 41.8 CFM 120 mm Fans 3-Pack | Purchased For $121.99 |
| Case Fan | Corsair iCUE QL120 41.8 CFM 120 mm Fans 3-Pack | Purchased For $121.99 |
| Custom | Corsair iCUE Commander PRO Smart RGB Lighting and Fan Speed Controller | Purchased For $60.19 |
| Custom | JBtek All Black Sleeved PWM Fan Splitter Cable 1 to 2 Converter, 2 Pack x 2 | Purchased For $13.98 |
| Custom | Asiahorse Power Supply Sleeved Cable for Power Supply Extension Cable Wire Kit 1x24-PIN/ 2x8-PIN (4+4) M/B,3x8-PIN (6+2) PCI-E 30cm Length with Combs(Dual EPS White) | Purchased For $32.99 |
| Prices include shipping, taxes, rebates, and discounts | ||
| Total | $2481.39 |
Performance
Memory is a big deal for Ryzen chips, and choosing the right pair of sticks that is also tested against the motherboard of choice took a little time but we got there. DDR4-3600 CL16 at 32gb is just right for this build, the key was finding CL16 tested against the 5000 series and MSI MAG B550M MORTAR motherboard. There’s a lot of builders who don’t check to see if the memory they chose was tested against their other components and while most of the time this will be OK … I don’t like spending a whole lot of my time trying to figure out what the problem is when my system wont POST or crashes randomly, just a precaution to save yourself from future headaches.
The 5800X is a hot chip. Originally I wasn’t going to do much tweaking away from the stock/factory settings but after running it for a couple weeks and monitoring temps it became clear that I needed to tinker with it a little bit. At stock the temps were as follows: 45 ℃ on idle and 80+ ℃ under load. That’s a bit much, I know some folks tolerate that and say the 5800X just runs hot but… I don’t think it’ll last a decade idling that hot, and after all this is a long-term build.
Using AMD Ryzen Master software I started to play with undervolting the chip as well as overclocking it. This is a good way to determine a stable config before modifying BIOS settings for a more permanent solution. I began by moving the CPU voltage down to 1.2 and clock speed up to 3,900 Mhz. Apply & Test, run Cinebench for a stress test, open HWMonitor to view temps and voltage. I ended up settling at and locking in 4,200 Mhz and 1.1375 CPU voltage. Not only did this significantly improved my Cinebench mark but also lowered temp to 31 ℃ at idle and 61 ℃ under load. That’s 14 ℃ idle and 19+ ℃ under load difference… and a big performance gain from stock to boot… I would also suggest to cool this chip down with at least a 280mm rad in push-pull fan config if possible.
In closing: 5800X is a damn good chip and I highly recommend it to anyone wanting to build a high performance system aimed at multitasking as well as heavy workload but keep in mind that it is designed to overclock, it is not an open box, install and forget about it chip. If you want something simpler and designed for set-it-and-forget-it kind of build go for the cheaper 5000 series chip that runs cooler, albeit sacrificing some cores and performance, like the 5600X.
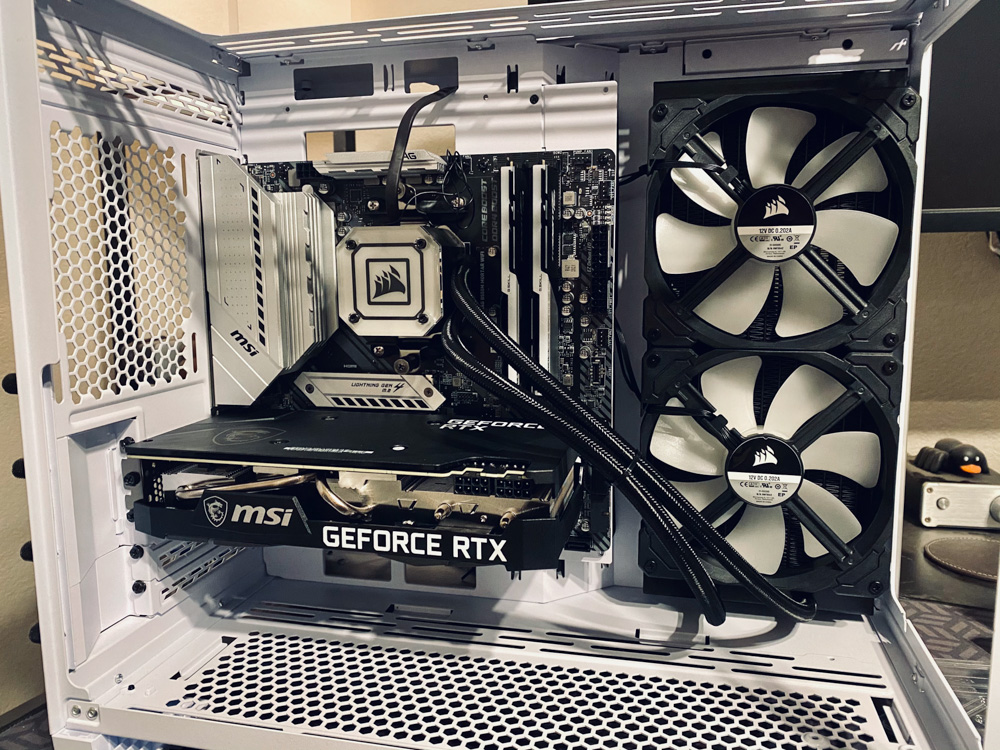
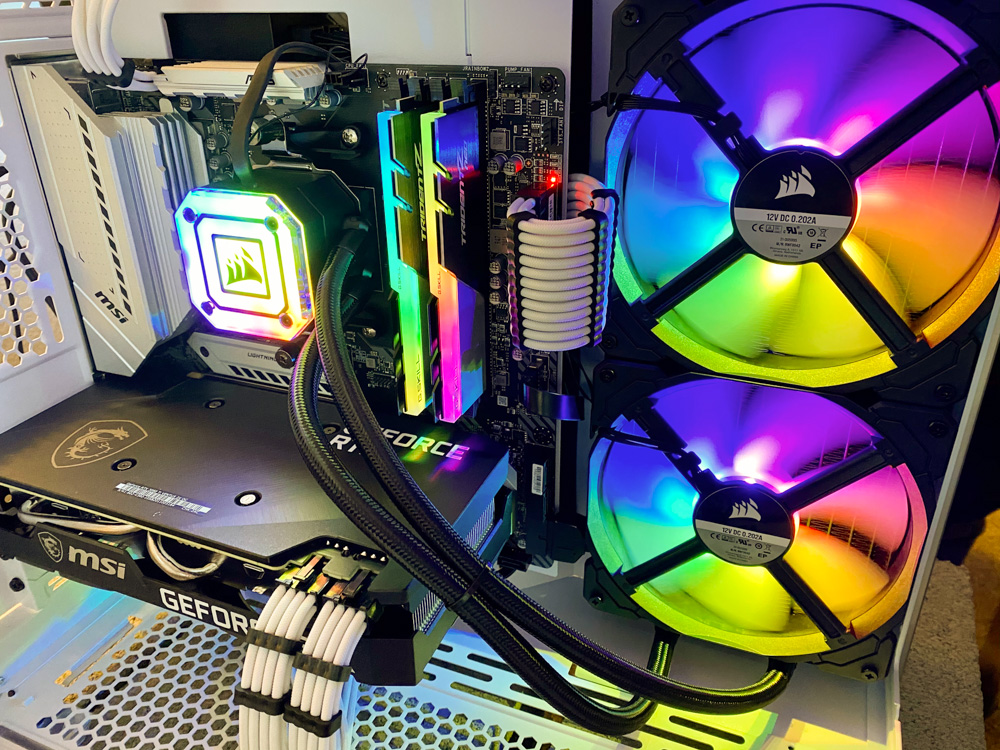
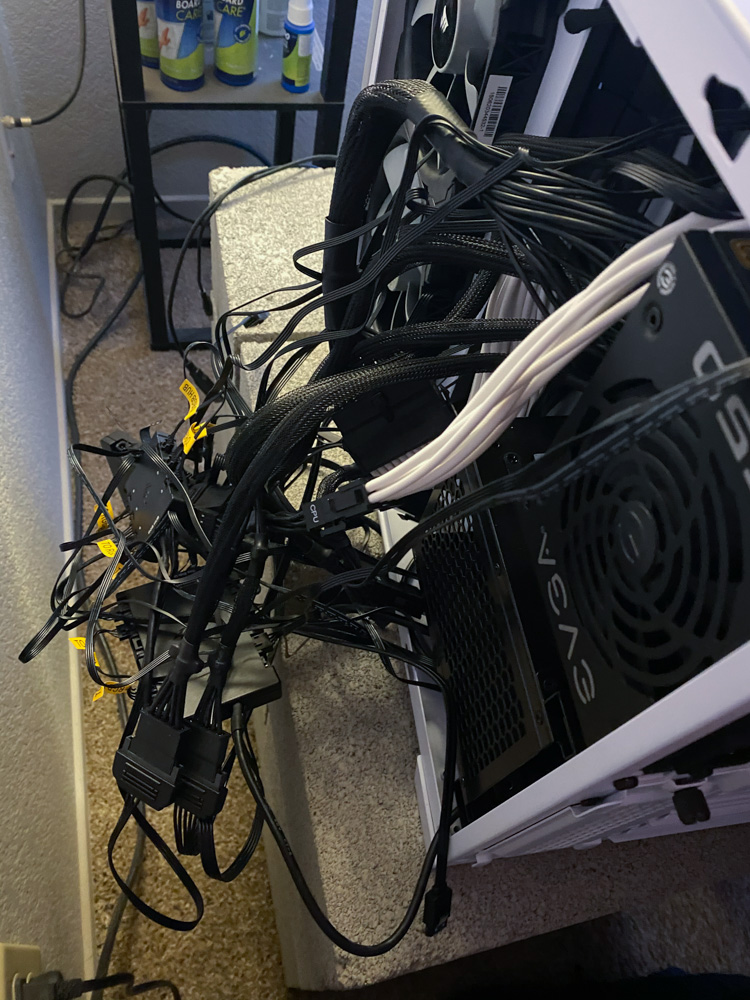
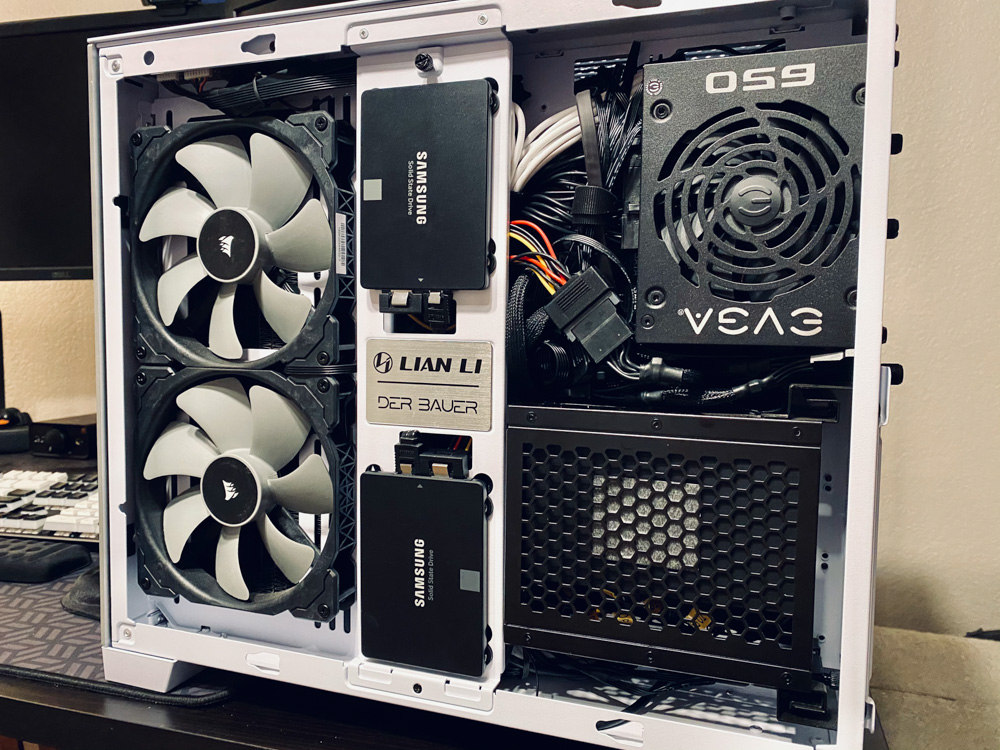
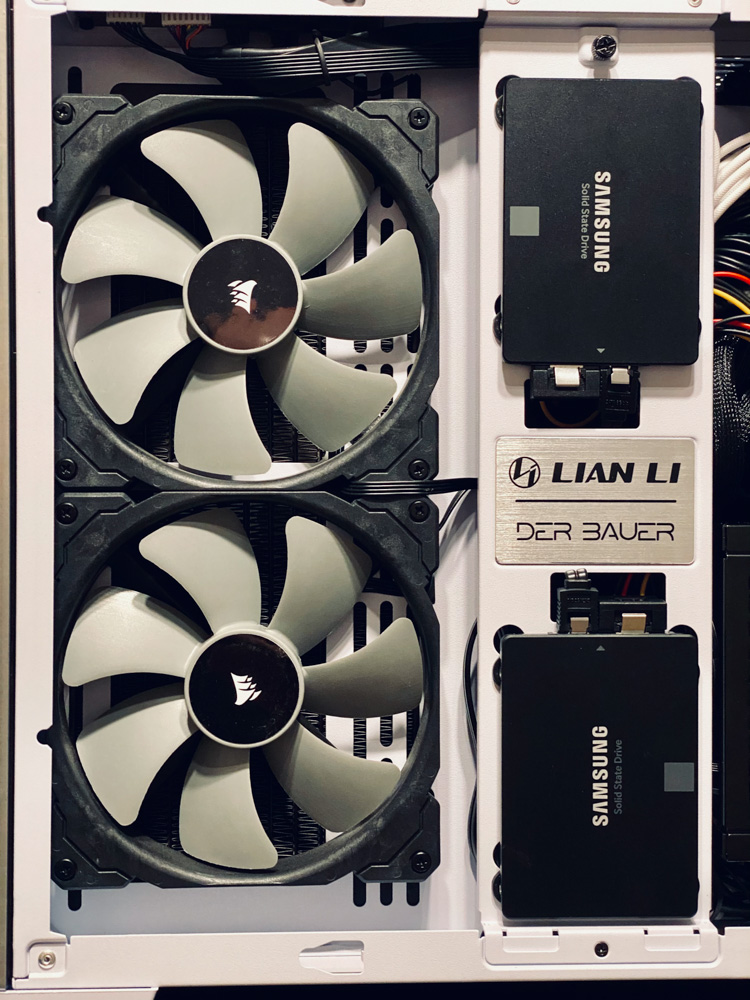
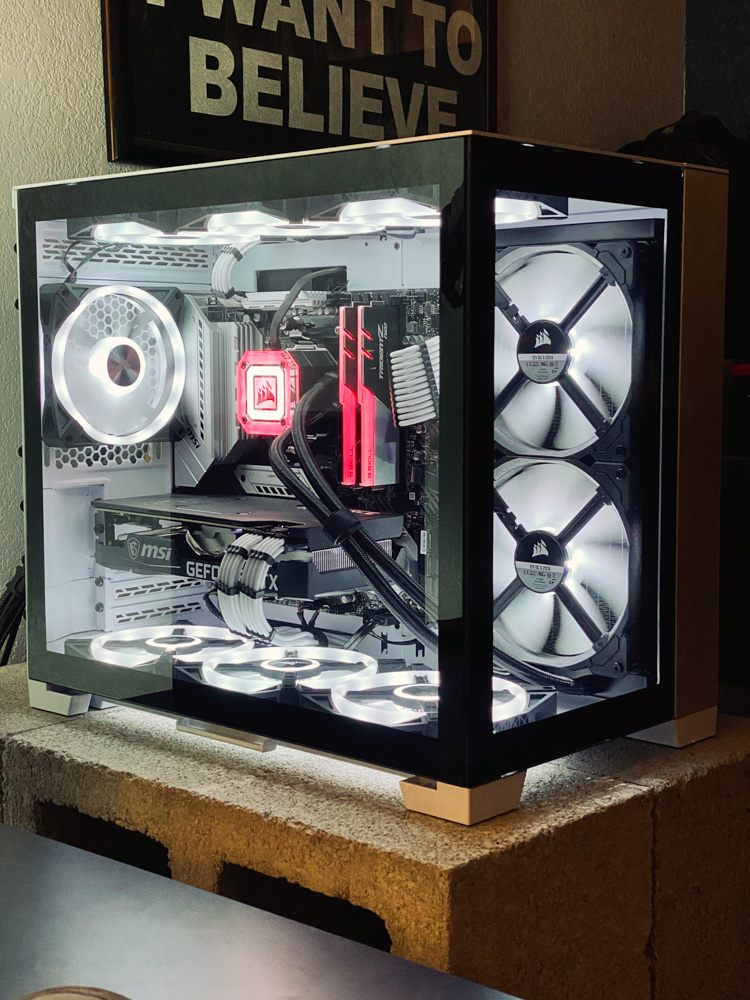
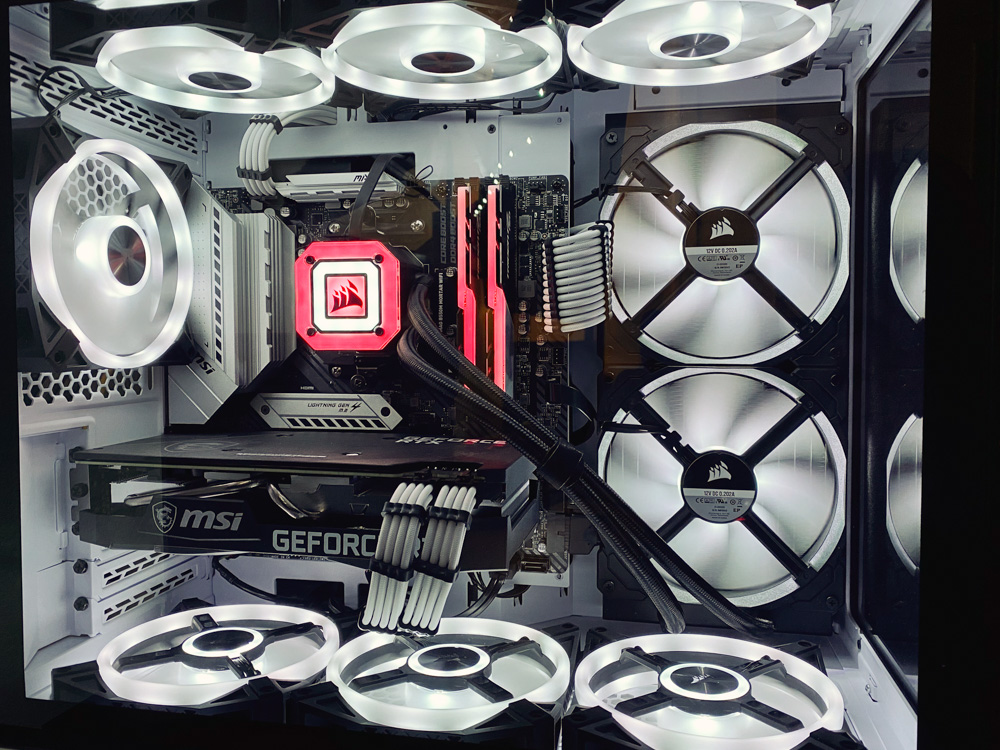
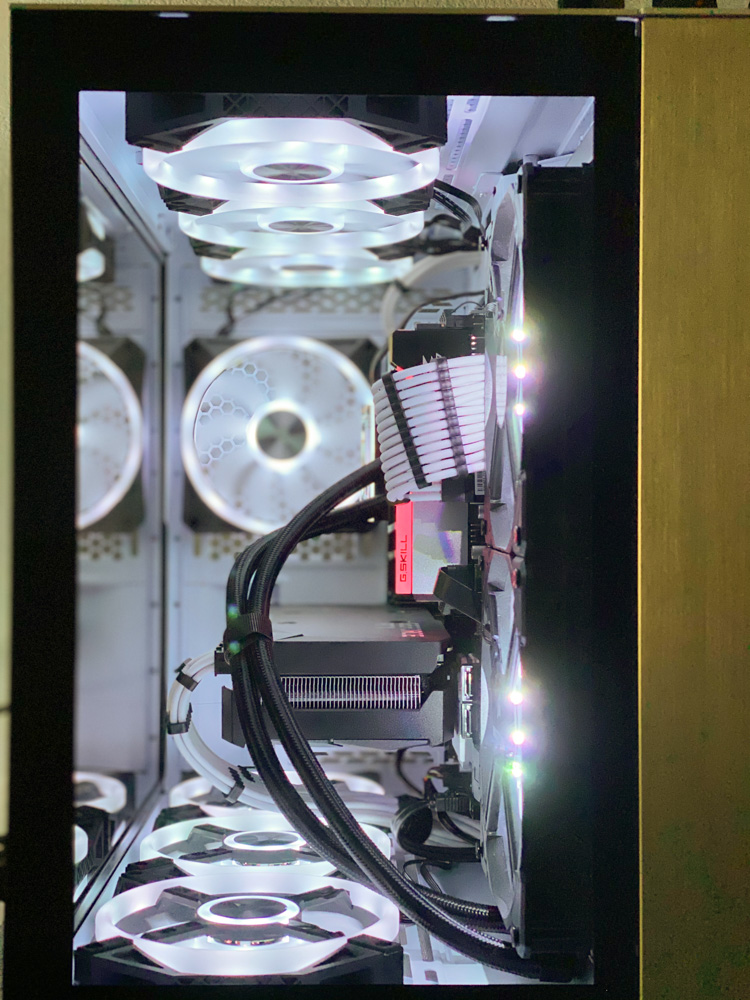
Photos
Finally, here are some photos of the build and the machine after getting everything up and running.
Final thoughts
I could have stuck with 5600X for better thermals at a cost of losing cores buuut since this is a long term work machine 5800X makes more sense for productivity and power over time. A bigger and more bang for your buck AIO cooler was selected for the 5800X as it is a hot chip. The 3060 Ti was selected because it’s just right for what I need this setup to do for me: productivity, web dev, design work with Adobe products, and light gaming… no need to go crazy here and it keeps my max wattage threshold down so I don’t need to upgrade to a larger PSU (sff PSUs are expensive).
A quick note about the ridiculous number of fans in this case: total of 11. It looks like overkill but the benefit of having so many is not just fancy LED lighting but most importantly noise level. No, more fans doesn’t always mean more noise. In fact, you can reduce the overall noise level of your system with sufficient airflow by lowering your fan speeds. The temps have been fantastic and it’s nearly whisper quiet between quiet and balanced settings.
I’m already pretty much set as far as peripherals are concerned; however, I’ve found this area to be much more frequent in purchase and gear swapping over the lifetime of the system. At the moment I’m running two 27” IPS panels and I’m thinking of ditching one of them for an ultrawide 34” panel… it’s very tempting for some light gaming and increased work area for this multitasking beast.
That’s all for the next 8 or more years as far as my main workhorse rig upgrade is concerned. Now, just like with any build if something comes up I’ll upgrade or replace as needed, maintenance is always going to be there.
Note
The PSU fan is pretty annoying when it spins up or winds down. A lot of times it’s running without the fan on at all during lower power tasks but when it comes time to get busy you’ll hear it tick away until it’s running at high enough RPM. It’s not a deal breaker and I’m not exactly ready to tear it out and replace it… In fact I’m pretty sure I start to hear it any time I get super focused and concentrate, so, in a way, I can relate.